Sometimes you mess up. Part of the picture is just not going to get right. If you are working in acrylic or oils, you can just paint over that part with white and start over. I had to do that with each of my big paintings at some point in the process. It is really scary to do, but once I have done it I feel so relieved. I was crying about my painting yesterday I felt so stuck. But after talking with my friendwe agreed I should paint over the parts I was struggling with and re do them. The painting is already looking loads better and I feel as though I can finish it in time for the art show. A few new ideas to add to the meaning of the painting even came out as I was re-arranging the details in the foreground.
I don't have pictures now, but I can't wait to show it to you when it is finished.
Monday, September 20, 2010
Monday, September 13, 2010
Week Three, again no new painting
I am undisciplined as of yet, and I prefer to flit between paintings. I worked a lot on three different paintings, and it looks as though I will get one of them done this week. I have been painstakingly correcting errors on the very large painting and laying down the under painting. Even with the careful preparatory drawings, there were some small color corrections to make, and I needed to fix some mistakes with placement of the feet and hands. Things that didn't really show until I saw the drawing larger.
I have been delinquent on getting photographs of my progress on my various paintings. But here is a photo of an example of under painting. It is often just laying out the basic shading. I will update with more current photographs soon.
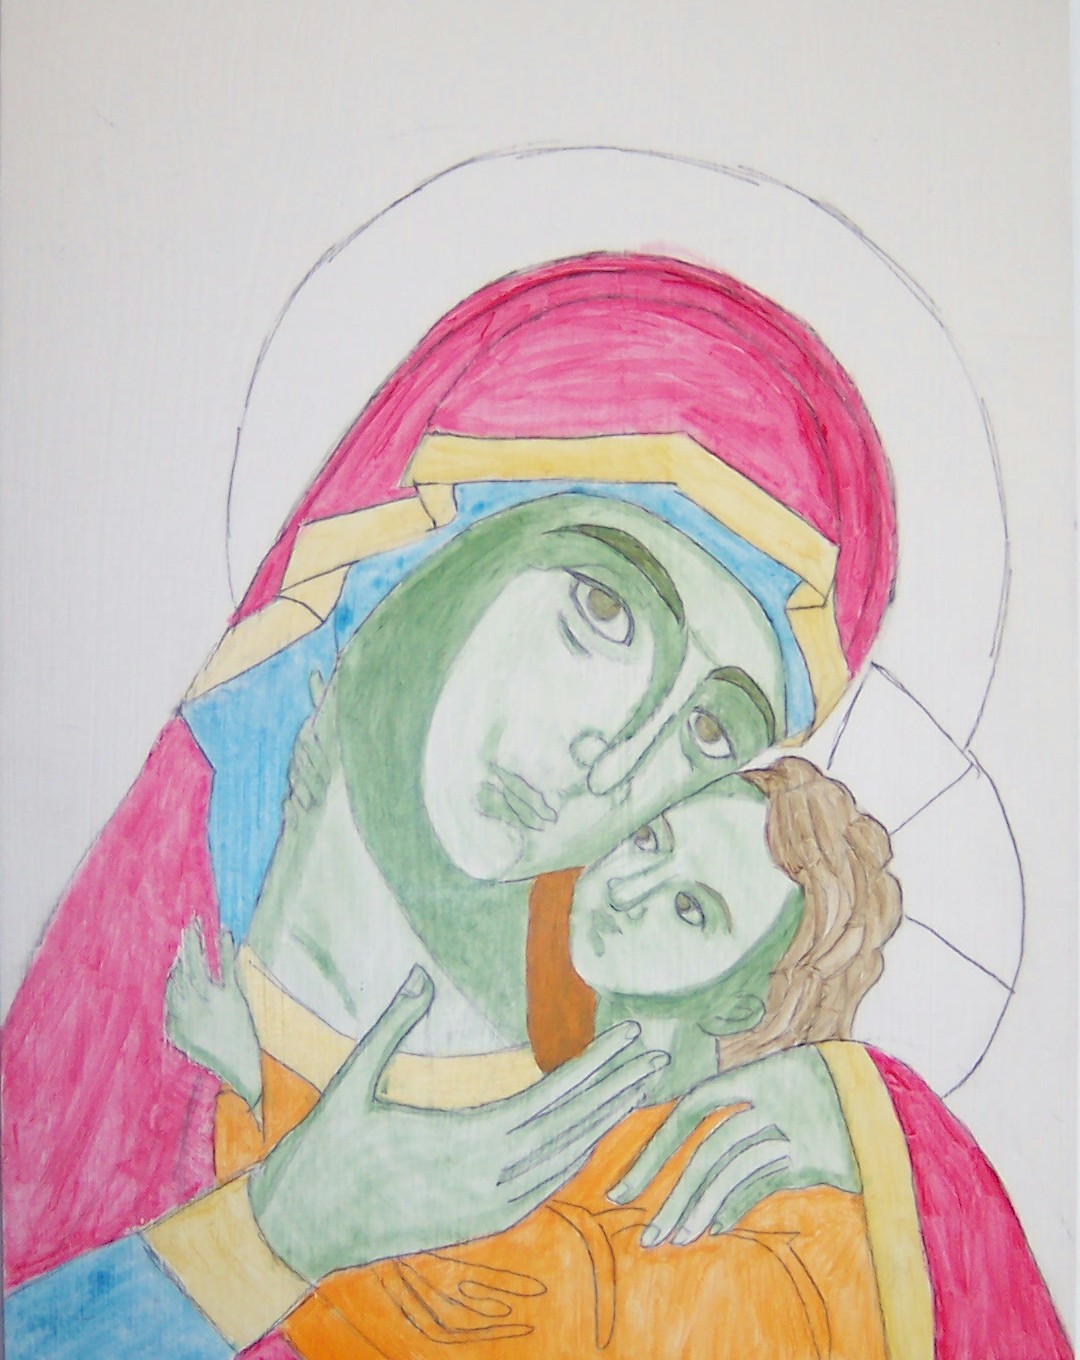 |
| Icon under painting by the hand of Sara Star |
I have been delinquent on getting photographs of my progress on my various paintings. But here is a photo of an example of under painting. It is often just laying out the basic shading. I will update with more current photographs soon.
Thursday, September 9, 2010
Best on the net
A Custom Artist's Desk
What was Monet's Pallette?
My favorite art this week:
Giving Props to a local Vancouver Artist
What was Monet's Pallette?
My favorite art this week:
Giving Props to a local Vancouver Artist
 |
| Tree Maiden Originally uploaded by lucidRose |
Wednesday, September 8, 2010
So busy!
Week 2 of my painting a week challenge has been diverted. My partner offered to change the living room into my new studio! It has north light from a huge window. Lots and lots of space for my jumbo easel, two smaller easels and my work table. There is even a place for a loveseat for friends to sit and my rocking chair for me to relax and think in.
I haven't gotten pictures yet because we are still finishing up the details. My dear friend Alex Birkett is going to share a corner of the studio with me so he can paint a jumbo sized canvas too. His will lean against the wall, so we need to set up a sheet behind his so the wall doesn't get paint all over it.
I will be back into my regular swing of things this week, as most of the studio is set up.
Friday, September 3, 2010
Projection and Transfering
 |
| A projected and traced image for a large painting by Sara Star |

I lay the transfer paper between the primed surface and my drawing and trace over the drawing with a pen or a stylus. I prefer drafting transfer paper because it is wax free. The wax can cause resist problems with my thin washes of acrylic paints. When I want to transfer an image onto a dark surface, I coat the back of the drawing with white conte crayon instead of using the dark transfer paper.
For blowing up an image there are several options. The classic option is to draw a grid on your drawing and a larger grid on your surface. This requires a lot of measuring, and counting. I find mathematical thinking pulls me out of the right brain thinking of drawing and I am likely to screw the whole thing up. Also, I don't like getting rid of the grid lines later.
For pictures around 3 feet tall, I scan my drawing, and then use a picture or publishing program to print it to size on tiles of paper and I tape the pieces of the picture together. Then I use the transfer paper method.
However, I sometimes work very very large. In these cases, I seek out projection equipment. At University, I had access to flat head projectors. Often for these I had to reduce the size of my drawing to fit into the projector, and then I hung the canvas on the wall and adjusted the projector to show my image. Then I would draw the image on with a soft conte or charcoal. It is important to use something soft that won't press the canvas in while you are drawing--moving the canvas moves where the projection falls.
 |
| Projecting an image with an InFocus Machine |
However, I don't always have access to the flat head projector. And I have learned to make due with and even prefer to use In Focus Projectors. Often local libraries, community centers and nearby colleges have rooms with In Focus Projectors. I can balance my canvas on the chalk board and then project a scanned image of my drawing onto the canvas. The image projected by an In Focus projector is even more fiddly than with the flat head projector, and so I prefer to paint on the image as I trace to avoid pressing on the canvas at all.
My post on creating a drawing for a large painting
Thursday, September 2, 2010
You are the week's link
 |
| My favorite painting this week: Dot Courson' Driver's Ed |
Natural Amber's Advice for getting front page coverage on Etsy
The Virtual Paint Out's September Map is: Manhattan Island
Calypso Moon's September Painting Challenge: Colorful Self Portraits
So those were my favorite art blog entries for the week. I hope to do the two painting challenges, but with my big show the first week of October, I might need to wait to take on new challenges until next month.
Wednesday, September 1, 2010
Dreams do come true
 |
| Sara sleeping with Fey in a bed of her hair by Sara Star |
Recently I have had some seemingly crazy dreams.
I described my dream studio.
While leafing through art history books, I dreamt of seeing my work/name in one.
I promised myself a real gallery show by the time I turned 30.
All these dreams are coming true now.
My husband saw my blog entry about studios. And told me to turn our living room into my studio. It has north light in a huge window, it has moldings that can be converted into a gallery hanging systems, it is next to the kitchen with plenty of extra cupboards and a sink. I had never thought of the living room space in that way before!
An art historian contacted me this week for inclusion in a book she is publishing. Woohoo!
And of course, I had quite a few gallery shows before I turned 30, and many to come after! My most exciting one coming this October!
Taking care of my internet presence has made a huge difference in these dreams coming true. You have to put yourself out there to get noticed!
Subscribe to:
Posts (Atom)